 6. Add the Allegro library to your project as follows:
a. Select Project / Project Options
b. Go to the parameters tab
c. Select add library or object
d. C:\Dev-Cpp\lib\liballeg.a
e. Select ok!
7. Compile and Run!
Creating Demos - Coder Tutorial #5
[Holiday Super Issue!]
By Polaris
A warm and hearty greetings to all you demo coders. I wrote this tutorial in december. That time of year never stops to amaze me. First of all, you have the cold weather and the seasonal events that bring far flung family together. Secondly, you also have the new calendar year looming ahead... which tends to make you review what you are doing and how you do them. I ponder if we can possibly cram more "seasonal fuzzies" into a shorter time frame?
Still, I hope your schedule can afford you to take a few moments for your enjoyment. This issue is a real special treat. At the end of the last issue I promised to discuss basic morphing and tweening for animation. And well... I'm sorry, I changed my mind. I hope you won't be too disappointed, but I'd like to cover that technique in another tutorial dedicated to vector graphics (including 3d wire frame). In its place we are going to create our own little scroller program, suitable to make simple classic holiday greetings for all your demoscene friends.
This scroller tutorial - is designed as a multi-part series where we start with a complete scroller program (this tutorial) and then build a scroller generator program in the future articles.
In the mean time grab the eggnog, fire up the furnace and get comfortable. As always make sure that Allegro and Dev C++ are handy.
Scrollers 101 - (Making our Own Scroller!)
Way back in Scene Rep issue #11 I started a discussion of intro systems, and how one in particular - "Intro Maker 3.0 by Sauron and ZigZag of THG (Circa 1992)" really helped to fuel my scene spirit. I still think this program is a classic - but it's challenge to run on a modern pc in the post DOS era. It's time for us to "roll our own", more compatible version. I'm especially hoping that this will give Analog-X the type of program he wanted when he started the thread "Looking for Intro Maker for PC" in the SR forum. Dude this is for you!
I have lots of goals to achieve with this program... in fact - so many goals that it wouldn't fit into a single tutorial. This is the start of a series of tutorials that will lead to making our tool similar to Intro Maker 3.0.
Let's outline the objectives for our first in the series (Scroller 101):
Complete:
While this is the first Scroller we are building I don't want to leave huge gaps
of functionality out. It's important that we have at least the basic functions:
- Background Image Display
- Text Scroller
- Music Playback
Configurable:
It would be pretty useless if you couldn't adapt the program to your own needs.
For Scroller 101, you can change the text message, the background picture and the music
file. At this stage you'll have to modify the C++ code to do this, but later on
we'll make our own intro generator.
A single exe:
It would look a bit ugly to send an exe with a picture file, a music file
and so forth. To clean that up we'll need a way to represent that data in our
resulting exe. If the recipient's email accepts exes - they should be able to just
double click and run your production. If not - you can send a renamed file, and ask
them to rename back upon receipt!
Oldschool
We are still going to stick with mode 13h a resolution of 320x200 with 256 colours.
Sure, you could make something with higher resolutions, or non-palettized video modes,
but this gives it an old school feel.
Iterative
We are going to build this application one step at a time. I realize that I haven't
discussed how I typically make these tutorials [or programs in general] - but I'm a big fan
of the iterative development model. We'll start with a basic framework and keep adding
features, till we are done. This tutorial has a total of eight parts (phases).
Phase #1 - Allegro Framework and Application
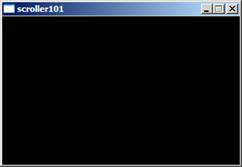
We'll begin with a simple allegro framework that waits for the user to hit an exiting key. Because full screen modes tend to interfere with the debugger (or for that matter killing the task if things do go wrong) we'll start with a windowed application. We will make it full screen as part of the very last phase. Let's get started!
1. Start Dev C++.
2. Start a new project [file / new project] .
3. Select Console Application, give it a name, and select OK.
4. Save the .Dev file to the folder of your choice.
5. Change the code in main.cpp to read:
#include "allegro.h"

#define screen_x 320
#define screen_y 200

using namespace std;


int main(int argc, char *argv[]) {
            allegro_init();        // init Allegro
            install_keyboard();    // setup allegro keyboard

            set_color_depth(8) ;   // 8 bit colour
            if (set_gfx_mode(GFX_AUTODETECT_WINDOWED, screen_x, screen_y, 0, 0)<0)
            {
                set_gfx_mode(GFX_TEXT, 0, 0, 0, 0);
                allegro_message("Failure to init video mode!\n%s\n", allegro_error);
   exit(1); // force abort
            }

// init more stuff  (next phase)

            while ((!key[KEY_ESC])&&(!key[KEY_SPACE]))
   {       // DO SOMETHING AMAZING HERE!     };

// de-init more stuff (next phase)

return 0;
}
END_OF_MAIN();
6. Add the Allegro library to your project as follows:
a. Select Project / Project Options
b. Go to the parameters tab
c. Select add library or object
d. C:\Dev-Cpp\lib\liballeg.a
e. Select ok!
7. Compile and Run!
At this point we have a simple allegro skeleton, but not much else.
Phase #2 - Part 1 - Making Music - Fmod / Project Setup
We will be making use of the FMOD music engine to do our musical playback. I'm a big fan of FMOD overall and especially admire its portability. Let's add basic music playback via Fmod.
1. Download fmod374 from fmod.org.
http://www.fmod.org/files/fmodapi374win.zip
2. Extract it to your dev c++ folder. You should have a directory structure
similar to the following:
C:\Dev-Cpp\fmodapi374win with the following folders underneath:
api
documentation
media
samples
samplesdelphi
samplesvb
tools
3. Return to your scoller project, where we'll begin to add code.
We'll need to add the fmod library to our project options (similar to the
allegro library).
a. Select Project / Project Options
b. Go to the parameters tab
c. Select add library or object
d. C:\Dev-Cpp\fmodapi374win\api\lib\ libfmod.a
e. Select ok!
4. Fmod applications require the fmod.dll file to run (more on this later). Copy your fmod.dll from C:\Dev-Cpp\fmodapi374win\api to your project folder (so your applications will run from the ide). If you don't do this step you will get an error message as shown: ("This application failed to start because fmod.dll was not found. Re-installing the application may fix the problem"). [Please note, I'll come back to binding dll files into the executable later on in this tutorial].

Phase #2 - Part 2 - Making Music - Coding simple playback.
At this point we can begin adding playback to our project.
1. To access our fmod functions, we'll need to add an "include" for the function headers so the compiler knows what we are talking about. You can do it at the top of main.cpp as follows: (adding just under #include "allegro.h")
#include "C:\Dev-Cpp\fmodapi374win\api\inc\fmod.h"
#include "C:\Dev-Cpp\fmodapi374win\api\inc\fmod_errors.h"
2. Inside our main application [just under "using namespace std;"] - we'll allocate our fmod data. For safety we'll force this data to NULL until it's allocated.
FMUSIC_MODULE *mod = NULL;
3. We are going to create 3 functions. One will init the fmod system for our purposes, the second will start playback, and the last will de-initialize the system. Add the code for the following functions under the line you just added (in step #2). (I've commented each part so it should be reasonably easy to see what's going on).
void Init_Music(void)
{
// verify FMOD version
if (FSOUND_GetVersion() < FMOD_VERSION)
{
        set_gfx_mode(GFX_TEXT, 0, 0, 0, 0);
        allegro_message("Error : You are using the wrong DLL version!  "
                        "You should be using FMOD %.02f\n", FMOD_VERSION);
        exit(1); // force abort
}

// Initalize Allegro
if (!FSOUND_Init(32000, 64, 0))
{
        set_gfx_mode(GFX_TEXT, 0, 0, 0, 0);
        allegro_message("Fmod Error: %s\n", FMOD_ErrorString(FSOUND_GetError()));
        exit(1); // force abort
}

// Set Allegro Message
mod = FMUSIC_LoadSong("86sec.s3m");
if (!mod)
{
        set_gfx_mode(GFX_TEXT, 0, 0, 0, 0);
        allegro_message("%s\n", FMOD_ErrorString(FSOUND_GetError()));
        exit(1); // force abort
}
}

void Play_Music(void)
{
        // Play Song!
        FMUSIC_PlaySong(mod);
}

void Kill_Music(void)
{
        FMUSIC_FreeSong(mod);
        FSOUND_Close();
}
4. At this point we'll need to call our functions. Add the function calls under "// init more stuff (next phase)"
Init_Music();
Play_Music();
Under "// de-init more stuff (next phase)" add:
Kill_Music();
5. We are almost at the point where we can do musical playback! However, you might notice that you are missing "86sec.s3m", a tracked music module. Great thanks go out to Soul D (http://soul_d.pwrsrc.net/) for supplying the tracked music. Download 86sec.s3m to your project folder. (Or supplement your own music file). You may also notice that at this point our s3m file is separate (not part of the exe) - we will fix that later on.
Go ahead and run your program. You should have a working allegro skeleton with basic music playback. Not a bad start! If You get a "file not found error", then you haven't saved the music file in the right position.
Phase #3 - The Scroller - Bitmap Fonts
At this point we have our music playing and a simple graphical framework. We still need to integrate the file into the exe (however I'll do that at the very end). The next step is to load a background image, and code a simple scroller. For now, I'd like to focus on the scroller side of things.
To give our program an old school feel we are going to use fixed sized bitmap fonts. Special thanks to Barzoule for pixeling this font. Download bigfont.pcx (included in the bonus pack inside scroller101.zip) into your project folder. You can also see the font here:

As you can see the font has 48 characters, 26 letters, 10 numbers and 12 punctuation characters. Each character is 32 pixels wide by 64 pixels high.
To implement our scroller we'll need to create a draw text function which will:
1. Loop against each letter of the "scroller message"
2. Draw the letter (which involves):
a. Figuring out where the character is in our font map (pixel level).
b. Figuring out where we want to display the character on screen.
c. Copying the character font to the screen (if visible).
Let's implement our scroller function!
1. We'll be manipulating character strings. To do this we will need access to the string library. With the other #includes at the top of the program add:
#include <string.h>
2. In addition - we'll need to store our font size. It's easiest to do this with some #defines, so near your #includes, add:
// font size #define font_width 32 #define font_height 64
3. We need to store our bitmap font data. Under "FMUSIC_MODULE *mod = NULL;" let's allocate our font and palette:
BITMAP *font_bmp; // the image from the pcx file
PALETTE font_pal; // the palette from the pcx file
4. We need the following basic functions, which should be added to our program (again, I've commented inline to make it as understandable as possible):
void Init_Font(void)
{
    font_bmp = load_bitmap("bigfont.pcx", font_pal);  // image load
    set_palette(font_pal);                            // use font palette
}

void Kill_Font(void)
{
    destroy_bitmap(font_bmp);     // release bitmap data
}

void DrawCharacter(int x,int y, char letter)
{
    int i;

    // figure out the character mapping for the letter.
    // Credits and greets go to Barzoule for this mapping approach
    char chrmap[]="abcdefghijklmnopqrstuvwxyz0123456789\"'(),.;:+-!?";

    // character map, as seen on bigfont.pcx.
    // char letter is passed by value (not by reference), so I can force upper
    // case letters to lower case to match the map.
    if(letter>='A' && letter<='Z')
        letter +='a'-'A';

    // do linear search
    for (i=0;i<strlen(chrmap)&&(chrmap[i]!=letter);i++);

    // Copy character from font_bmp to screen. (if we found a valid one)
    if (i<strlen(chrmap))
      if ((x+font_width)>0 && x<screen_x)
      // verify that the x position is visible
        masked_blit(font_bmp, screen,
                i*font_width,0, // font position
                x, y, // letter on screen
                font_width, font_height); // letter dimensions

}

void DrawString(int x,int y,char *message)
{
    int i;

    for (i=0;i<strlen(message);i++)
        DrawCharacter(x+i*font_width,y,message[i]);
}
5. At this point we've got fantastic functions to draw a string of text! We still need to animate this to create a scoller. This means we'll need to add timing functions, functions to clear the screen, and call our scroller functions. Let's do it!
a. Under "int main(int argc, char *argv[]) {" add our frame count variable, and initialize it.
int framecount;
framecount=0;
b. Between "init_music()" and "play_music" add:
Init_Font();
install_timer();
c. At "// DO SOMETHING AMAZING HERE!" add:
clear_bitmap(screen);
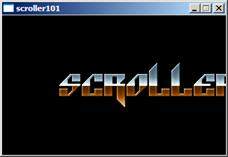
DrawString((framecount % 640)-320,68,"SCROLLER");
framecount+=1;
rest(1);
d. Under "Kill_Music()" add:
Kill_Font();
remove_timer();
Voila! We now have our very own scroller. Go ahead and run it! You should see "scroller" scroll from the left of the right side... across the borders of the screen. As defined by our simple formula (framecount % 640)-320.
When you run the program you will probably notice some bad flickering. That's caused by a delay between when we clear the screen, and display the text, leaving the text appearing "flashed" on the screen. We'll use a technique called double buffering to fix it.
Phase #4 - Double Buffering for Flicker Free Output
In order to prevent the flickering we saw at the end of phase #3, we are going to draw our screen data "off of the screen" into a data buffer. When the right time comes, we will take our off screen data buffer and quickly copy that to the screen in one streamlined operation. While it's possible to do double buffering with "page flipping", where we would use video modes with multiple "off screen pages", we are going to stick with this simple approach.
1. We need to allocate our double buffer. Underneath our font palette ("PALETTE font_pal;"), we'll add our double buffer as follows:
BITMAP *off_screen; // off screen buffer
2. Now we'll need to allocate our off screen buffer. I added my allocate code right before the Init_Music() call:
off_screen = create_bitmap(screen_x, screen_y);
3. Now, we've just allocated something - we'll also need to de-allocate it. Just before Kill_Music() add:
destroy_bitmap(off_screen); // release screen buffer
4. Now! Instead of drawing our characters to the screen, we need to draw them to the off screen buffer. Change as follows
masked_blit(font_bmp, screen,
                i*font_width,0, // font position
                x, y, // letter on screen
                font_width, font_height); // letter dimensions
becomes:
masked_blit(font_bmp, off_screen,
                i*font_width,0, // font position
                x, y, // letter on screen
                font_width, font_height); // letter dimensions
5. Similarly, we need to clear our off screen buffer rather than the onscreen one.
clear_bitmap(screen);
 becomes:
clear_bitmap(screen);
6. The last step to double buffering is putting our off_screen buffer to the screen. Just before rest(1); add:
vsync();
blit(off_screen, screen, 0, 0, 0, 0, screen_x, screen_y);
Voila! We now have a very flicker free scroller text! You can change your message to whatever you'd like, adjusting the formula to scroll the text as you'd see fit. The scrolling should be as smooth as silk!
Phase #5 - Adding a Background Image
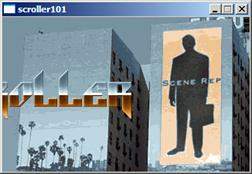
We have almost completed our simple scroller program. We need to add our background image, as well as package it all up into a nice little package. I decided a nice background image for the test scroller would be the Scene Rep logo. I'm sure you'll be replacing it with your own (more seasonally appropriate) one. For now, add backgrnd.pcx (in the bonus pack inside scroller101.zip) to your project folder.
As usual, we'll need to extend our variables. Add our next definition to our group of global variables at the top of the program:
BITMAP *background; // background buffer
Our next step is to initialize the background. That's still fairly simple; just under our call to create_bitmap add:
background = load_bitmap("backgrnd.pcx", NULL); // image load
Now, instead of clearing our bitmap buffer we'll copy our background image onto the screen.
clear_bitmap(off_screen);
becomes
blit(background, off_screen, 0, 0, 0, 0, screen_x, screen_y);
As usual, we need to end things off by freeing memory:
destroy_bitmap(background);
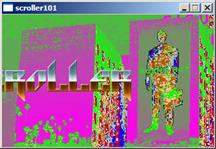 Go ahead and run the program. I'll guarantee that you'll notice some weird behavior.
The background doesn't look good! (Why is that?) .. well, the problem is our palette.
Go ahead and run the program. I'll guarantee that you'll notice some weird behavior.
The background doesn't look good! (Why is that?) .. well, the problem is our palette.
The backgrnd.pcx and the bigfont.pcx use completely different palettes. We didn't load the background palette at runtime. Instead we used the font palette; which is quite a bit different than the background image palette. In the end the result looks strange. Let's fix it!
Phase #6 - Resolving The Palettes
There are any number of ways to resolve the palette. For one thing, we can divide our 256 colour palette into regions. 0-32 for the font, 33-255 for the rest of the image. We could calculate this on the fly in our program - or even adjust the pcx files themselves so both the font and the background image use the same palette. We could even create a single "master palette" and force all our images to use it. While some approaches are better than others (the master palette isn't so hot), most of the other results look the same. So in the end we have just three choices:
1. Pre-cook our images so they play nicely together [this is what allegro suggests in their faq]:
How can I convert my graphics to all use the same 256 color palette?
See the Allegro.cc homepage (http://www.allegro.cc/) for some utilities, for example
FixPal and Smacker.
2. Design our own palette adjustment code.
3. Don't use palette video modes (wink) ;-)
Our eventual objective is to generate a tool to make scroller intros. I think it's probably the most sensible to assume that it would be a pain to force our users to manually adjust their palettes. You could try to include some third party tool with your intro maker; but that's sticky as well. The most sensible thing to do is fix the problem "in house!", without chickening out and using a higher colour mode.
Each colour is made up of RGB values. Every one of our 256 colours has a range of 0-63 in red, 0-63 in green and 0-63 in blue. We need to pick a new palette which can represent the colour distribution of our font image and our background image.
I should mention that you can also treat colours as vectors. Vector <x,y,z> is really the same as <r,g,b>. This is useful - because we can figure out how "close" colours are to each other. This is really an application of the Pythagorean theorem, calculating the distance between two points.
The formula: colour_distance=square_root((r1-r2)^2 +(g1-g2)^2 +(b1-b2)^2)
calculates the distance between colour vectors <r1,g1,b1> and <r2,g2,b2>
Confusing as all heck right? Well, don't sweat that too much. I'll be dealing with vectors in depth in another tutorial series. What is important is to realize is that we can find the best match for a colour RGB value in a palette (in fact allegro has a function to do this!). This means the only thing we really have to do is figure out how to make our own special combination palette.
To make our own combo palette we will use a frequency table. Each time a colour is used [r][g][b], we'll update the count in our frequency table freq. In the end we'll have an idea of how the colours are distributed in our table (also known as a colour histogram). One that's complete, we'll take our top 255 histogram colours (most popular colours) and compose a new palette. Sound simple? It is!
One more step is required however. We'll need to adjust our images to use the new palette. Remember they think index X is a certain RGB value. We'll scan down the images and replace the colours one at a time to correct them. Sounds slow? It is, but luckily we only have to do it once at program startup. Let's code!
1. Add a define for font X since we'll need to adjust our two images after the brave new world.
#define font_x 1536
2. Add our new palette variable to our global list, as well as our background palette:
PALETTE combo_pal;
PALETTE background_pal;
3. Modify the background image loader to also load our palette instead of sending it to "NULL":
background = load_bitmap("backgrnd.pcx", background_pal); // image load
4. Remove any calls to set_palette(..); as we won't be using those palettes (ie, remove set_palette(font_pal);)
5. Add our new palette routine:
void ResolvePalettes(PALETTE font_pal,PALETTE img_pal,BITMAP *font_bmp,
    BITMAP *img_bmp,PALETTE out_pal)
{
    int freq[64][64][64];
    int r,g,b;
    int x,y,i;
    int best_freq_value;

    RGB bestColour;
    RGB tempColour;

    // initalize the palette frequency table to 0
    memset(freq,0,sizeof(freq));

    // populate colour frequency for font
    set_palette(font_pal); // used by get_color
    for (x=0;x<font_x;x++)
        for (y=0;y<font_height;y++)
        {
                get_color(getpixel(font_bmp,x,y),&tempColour);
                freq[tempColour.r][tempColour.g][tempColour.b]++; // inc freq
        }

    // populate colour frequency for background
    set_palette(img_pal); // used by get_color
    for (x=0;x<screen_x;x++)
        for (y=0;y<screen_y;y++)
        {
                get_color(getpixel(font_bmp,x,y),&tempColour);
                freq[tempColour.r][tempColour.g][tempColour.b]++; // inc freq
        }


    // we now have color frequencies, let's build a palette from it.
    // we want to make sure that black is included, so we'll force it
    out_pal[0].r=0;out_pal[0].g=0;out_pal[0].b=0;
    freq[0][0][0]=-1; // not required.
    for (i=1;i<256;i++)
    {
        // scan the frequency table, finding the "best frequency" to use.
        best_freq_value=0;
        bestColour.r=0;  bestColour.g=0;  bestColour.b=0;
        //allegro_message("entering scan");
        for (r=0;r<64;r++)
                for (g=0;g<64;g++)
                        for (b=0;b<64;b++)
                            if (freq[r][g][b]>best_freq_value)
                            {
                               bestColour.r=r;
                               bestColour.g=g;
                               bestColour.b=b;
                               best_freq_value=freq[r][g][b];
                            }

        // adopt best palette
        out_pal[i]=bestColour;
        freq[bestColour.r][bestColour.g][bestColour.b]=-1; // force new pick
    }

    // adjust images to use the best colour
    set_palette(font_pal);
    for (x=0;x<font_x;x++) // font image
        for (y=0;y<font_height;y++)
        {
                if (getpixel(font_bmp,x,y)==0)
                   putpixel(font_bmp,x,y,0); // preserve colour 0 for masking
                else
                {
                  get_color(getpixel(font_bmp,x,y),&tempColour);
                  putpixel(font_bmp,x,y,
                                bestfit_color(out_pal,
                                tempColour.r, tempColour.g, tempColour.g));
                }
        }

     set_palette(img_pal);
     for (x=0;x<screen_x;x++) // background image
        for (y=0;y<screen_y;y++)
        {
                get_color(getpixel(img_bmp,x,y),&tempColour);
                putpixel(img_bmp,x,y,
                                bestfit_color(out_pal,
                                tempColour.r, tempColour.g, tempColour.g));
        }
}
 6. Wow! That was a big routine. However, it should be easy to see what's going on.
The very last step is to call our new routine. I do that between Init_Font() and
install_timer():
6. Wow! That was a big routine. However, it should be easy to see what's going on.
The very last step is to call our new routine. I do that between Init_Font() and
install_timer():
ResolvePalettes(font_pal,background_pal,
font_bmp, background,combo_pal);
// use our new palette!!!
set_palette(combo_pal);
Go ahead and run your scroller! You should now see your text proudly displaying without clobbering the background.
Phase #7 - Wrapping It Up With a Bow On Top!
We are almost at the point where we have satisfied our requirements. The code is a bit messy with our global variables, but I'm not going to worry about that just yet. There are two objectives I want to turn my attention to. I'd like to make it easier to change the scroller message and secondly I'd like to package it all up.
The first step to making a generic scrolling formula will be moving the scroller text into a string. I want the text to simply scroll from right to left, and to loop. (notice we are changing direction now to something a little less sea sickening). This means our drawing starts at the right edge (320 pixels), and the starting point decreases up until the point that the last letter is displayed.
Let's add this functionality into our program now:
Under framecount=0 add your message:
char msg[]="Greetings out there to all you scroller 101 readers!  "
           "Have a great xmas! - Polaris";
Modify your main animation loop to look as follows:
while ((!key[KEY_ESC])&&(!key[KEY_SPACE]))
    {
        // DO SOMETHING AMAZING HERE!
        blit(background, off_screen, 0, 0, 0, 0, screen_x, screen_y);
        DrawString(screen_x-framecount,68,msg);
        if (((strlen(msg)*font_width)-framecount+screen_x)<=0)
               framecount=0;
        framecount+=1;

        vsync();
        blit(off_screen, screen, 0, 0, 0, 0, screen_x, screen_y);
        rest(1);
    };
Voila! We have modified our message, and made it easy to extend. Before we move on - change from windowed mode to full screen mode, as we are ready to bundle our exe! (as follows):
if (set_gfx_mode(GFX_AUTODETECT_FULLSCREEN, screen_x, screen_y, 0, 0)<0)
Our last objective was to package it all up. It's been a long tutorial, and packaging it up will involve lots of files. We've got two pcx files, a music file, and two dll's. How can we achieve this?
For the purpose of scroller 101 - we are going to cheat and use a 3rd party tool. This tutorial is already pretty long, and I don't want to delay you from getting your own creations out the door. In scroller 201 we'll make changes for our own solution. For now, we are going to use a bundle program called PEBundle. There are a few different ones to choose from (Alloy , MoleBox etc) - but PEBundle offers the best trial. Go ahead now and download pe-bundle from http://www.collakesoftware.com/files/pebsetup.zip
Once installed fire up the pe-bundle gui.
1. Set host to scroller101.exe.
2. Add modules - fmod.dll.
3. Add modules - alleg40.dll - from C:\Dev-Cpp\allegro\lib\mingw32.
4. Add module - backgrnd.pcx (in our main folder).
5. Add module - bigfont.pcx.
6. Add module - 86sec.s3m.
7. Select bundle! And voila! You have your own executable.
The end result may be called scroller101.exe. Change the messages, change the fonts, change the colours - and you've got a nice scroller greeting to share with your friends!
Your Turn - Ideas for Experiments and Enhancements
Well folks, that's the end of this tutorial. I'm sure you already have some ideas for enhancements, and I suggest you play with them! Here are a few ideas off the top of my head for things that you might like to play with.
1. Add effects - we've already covered snow, wormholes, and cross fading. If you are careful with your palettes [and do some tinkering], you can have your scroller moving on top of a traditional demo scene effect.
2. Sinusoidal scroller! Yup! Why not move the text up and down? Or better yet - make a sinus path for the letters to follow?
3. This should go without saying, but don't forget to replace the font with your own design, and the logo! Make it your own!
What's Next in Scroller 201 and Beyond?
To be honest, it doesn't always work out. Sometimes these tutorials get really long, and I have to draw the line somewhere. However, for tutorial 201 I envision:
1. Better code breakdowns - time to eliminate those global variables baby!
2. Did you notice the palette calculation is rather slow? We can improve on that by reducing the number of times we scan the frequency table. We can do that by making a new table - a "frequency" of "frequencies" table. I'll discuss that optimization next time!
3. Moving away from .dll files so we have one less thing to "bundle".
4. Integrating the music file / font file / background file into the executable, without a 3rd party tool.
For Scroller 301 and beyond:
1. A generator program to take a font / picture / message / music file - and make an exe.
2. Improved font positioning - setting up variable paths etc.
Coming Soon!
As I mentioned ealier... we've got two choices for our next article: Vector graphics + tweening (or) Scrollers 201. Be sure to cast your votes. I'd also like to hear from you! Be sure to include me in your Holliday scroller mailing list!
A holiday super issue wouldn't be complete without some New Year resolutions. I'd like to start to leave the old school behind. I'm satisfied that we've exposed some cool techniques, but imagine it would be good to start to dive into some acceleration. Expect more pointers to resources on the web, as we bravely move forward in the new year.